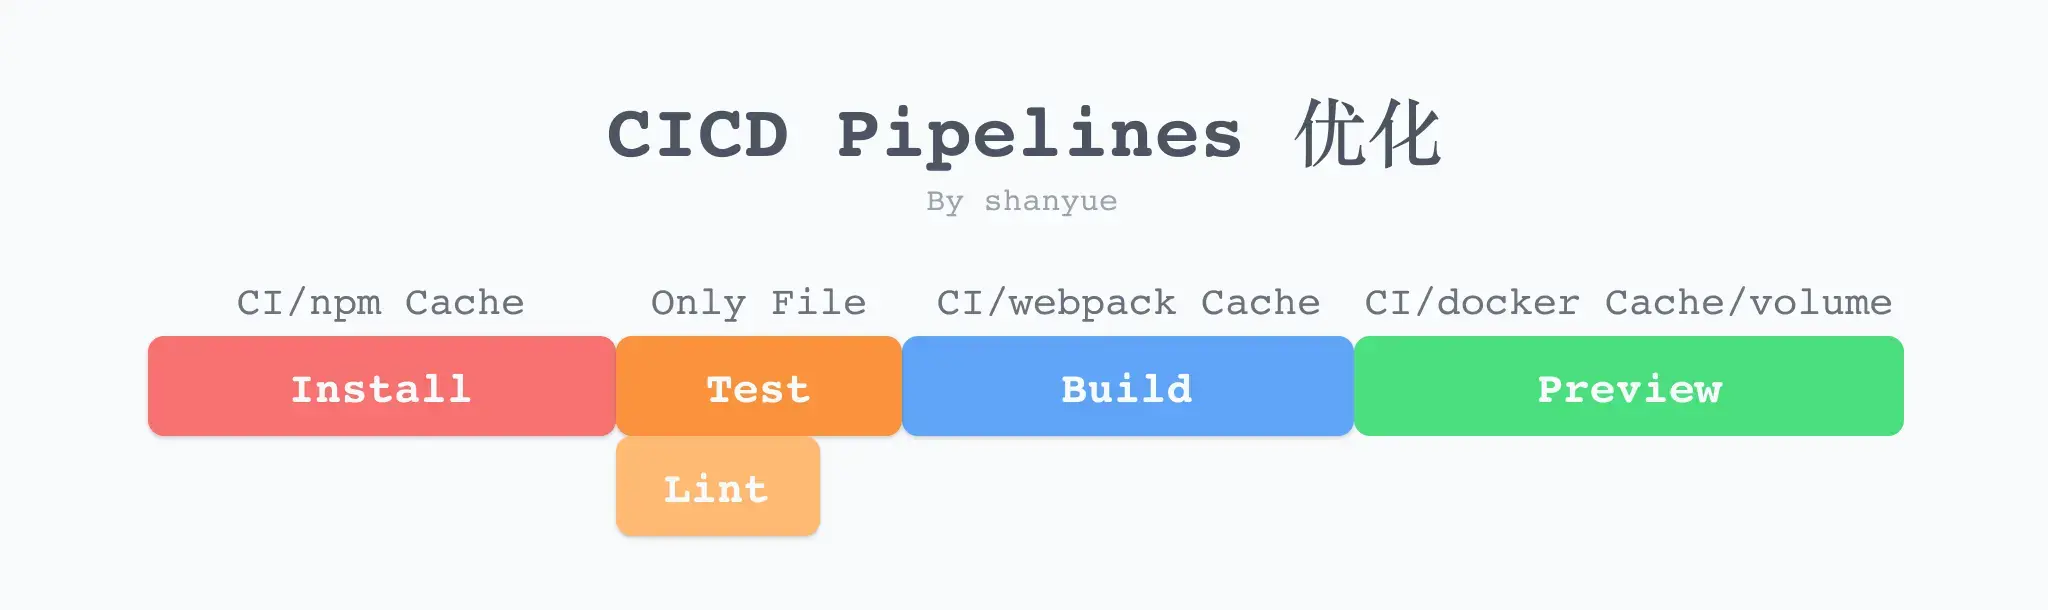
使用 CI Cache 加速 npm i/npm run build
在上一篇文章提到 Lint/Test 在 CI Pipeline 不同的阶段共享资源目录需要利用 CI 中的 Cache。
其实不仅如此
- 当我们使用 npm i 进行依赖安装时,由于 node_modules 目录已存在,将只会安装最新添加的依赖。
- 当我们使用 webpack 5 进行构建时,如果使用了
filesystem cache,因为在磁盘中含有缓存 (node_modules/.cache),二次构建往往比一次构建快速十几倍。
而在 CICD 中,这些都失去了意义,因为 CICD 每次 Job 都相当于新建了一个目录,每次构建都相当于是首次构建。
但是,CI 提供了一些缓存机制,可以将一些资源进行缓存。如果每次可以将缓存取出来,则大大加速了前端部署的速度。
不使用缓存的 Insall/Build 执行时间
以优化 npm run build 为例。
如果不进行任何缓存上的优化,仅需要 install/build
$ yarn

$ npm run build
翻译成 Github Actions:
name: Build
on: [push]
jobs:
  build:
    runs-on: ubuntu-latest
    steps:
      - uses: actions/checkout@v2
      - name: Setup Node
        uses: actions/setup-node@v1
        with:
          node-version: 14.x
      - name: Install Dependencies
        run: yarn
      - name: Build Dependencies
        run: npm run build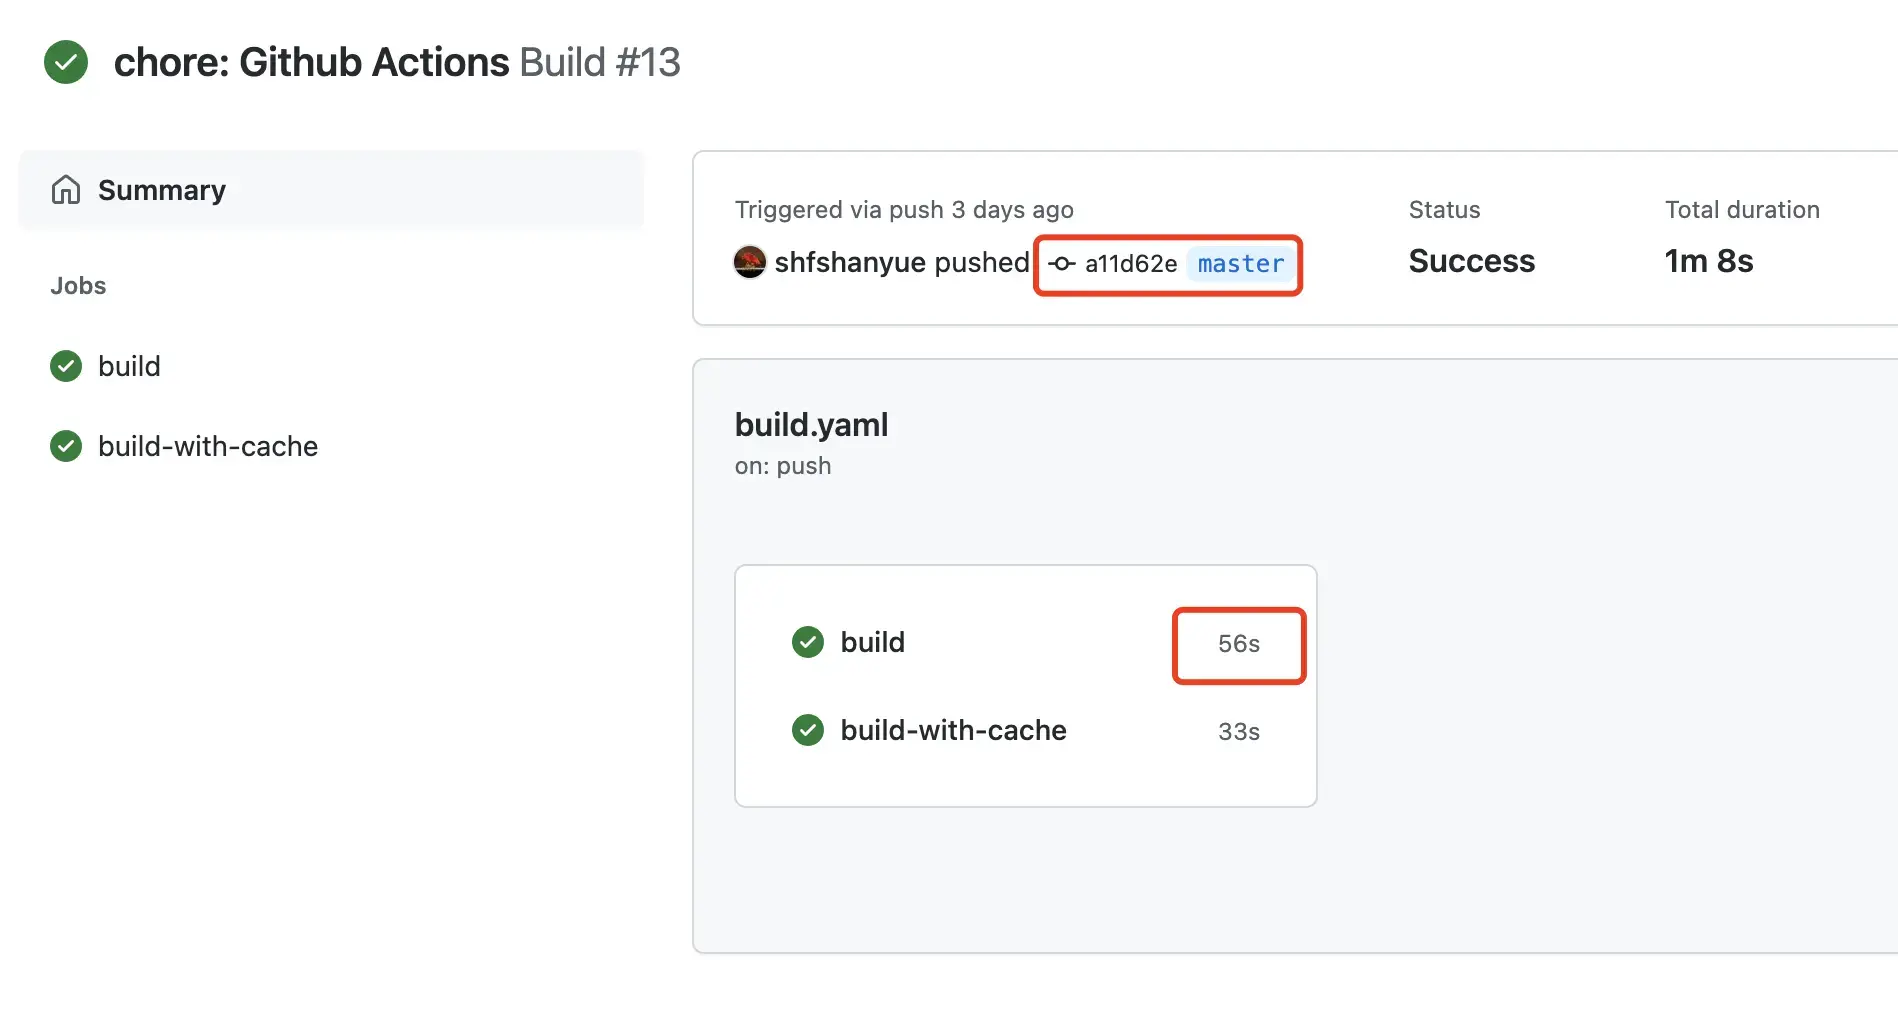
从截图可以看出来此次执行耗时 56s,其中大部分时间花费在依赖安装上
关于截图的本次 Action (opens in a new tab) 执行情况
利用缓存进行优化
如果可以对 node_modules 进行缓存,那么有以下两个好处
- 假设没有新的 package 需要安装,则无需再次
npm i/yarn - 假设存有新的 package 需要安装,仅仅会安装变动的 package
在 Github Actions 中,通过 Cache Action (opens in a new tab)
- path: 指需要缓存的目录
- key: 根据 key 进行缓存,如果存在相同的 key,则为命中 (hit)。在 Github Actions 中可利用函数
hashFiles针对文件计算其 hash 值。 - restore-keys: 如果 ke 未命中,则使用 restore-keys 命中缓存。
根据 Cache Action 针对 npm 中的 node_modules 进行缓存
- name: Cache Node Modules
  id: cache-node-modules
  # 使用 cache action 进行目录资源缓存
  uses: actions/cache@v2
  with:
    # 对 node_modules 目录进行缓存
    path: node_modules
    # 根据字段 node-modules- 与 yarn.lock 的 hash 值作为 key
    # 当 yarn.lock 内容未发生更改时,key 将不会更改,则命中缓存
    # 如果使用 npm 作为包管理工具,则是 package-lock.json
    key: node-modules-${{ hashFiles('yarn.lock') }}
    restore-keys: node-modules-
缓存 node_modules 有时会存在问题,比如 npm ci 在 npm i 之前,特意将 node_modules 删除以保障安全性。
如果不想缓存 node_modules,可以缓存 npm/yarn 全局缓存目录。通过以下命令可知他们的全局缓存目录
- npm:
npm config get cache,如~/.npm - yarn:
yarn cache dir
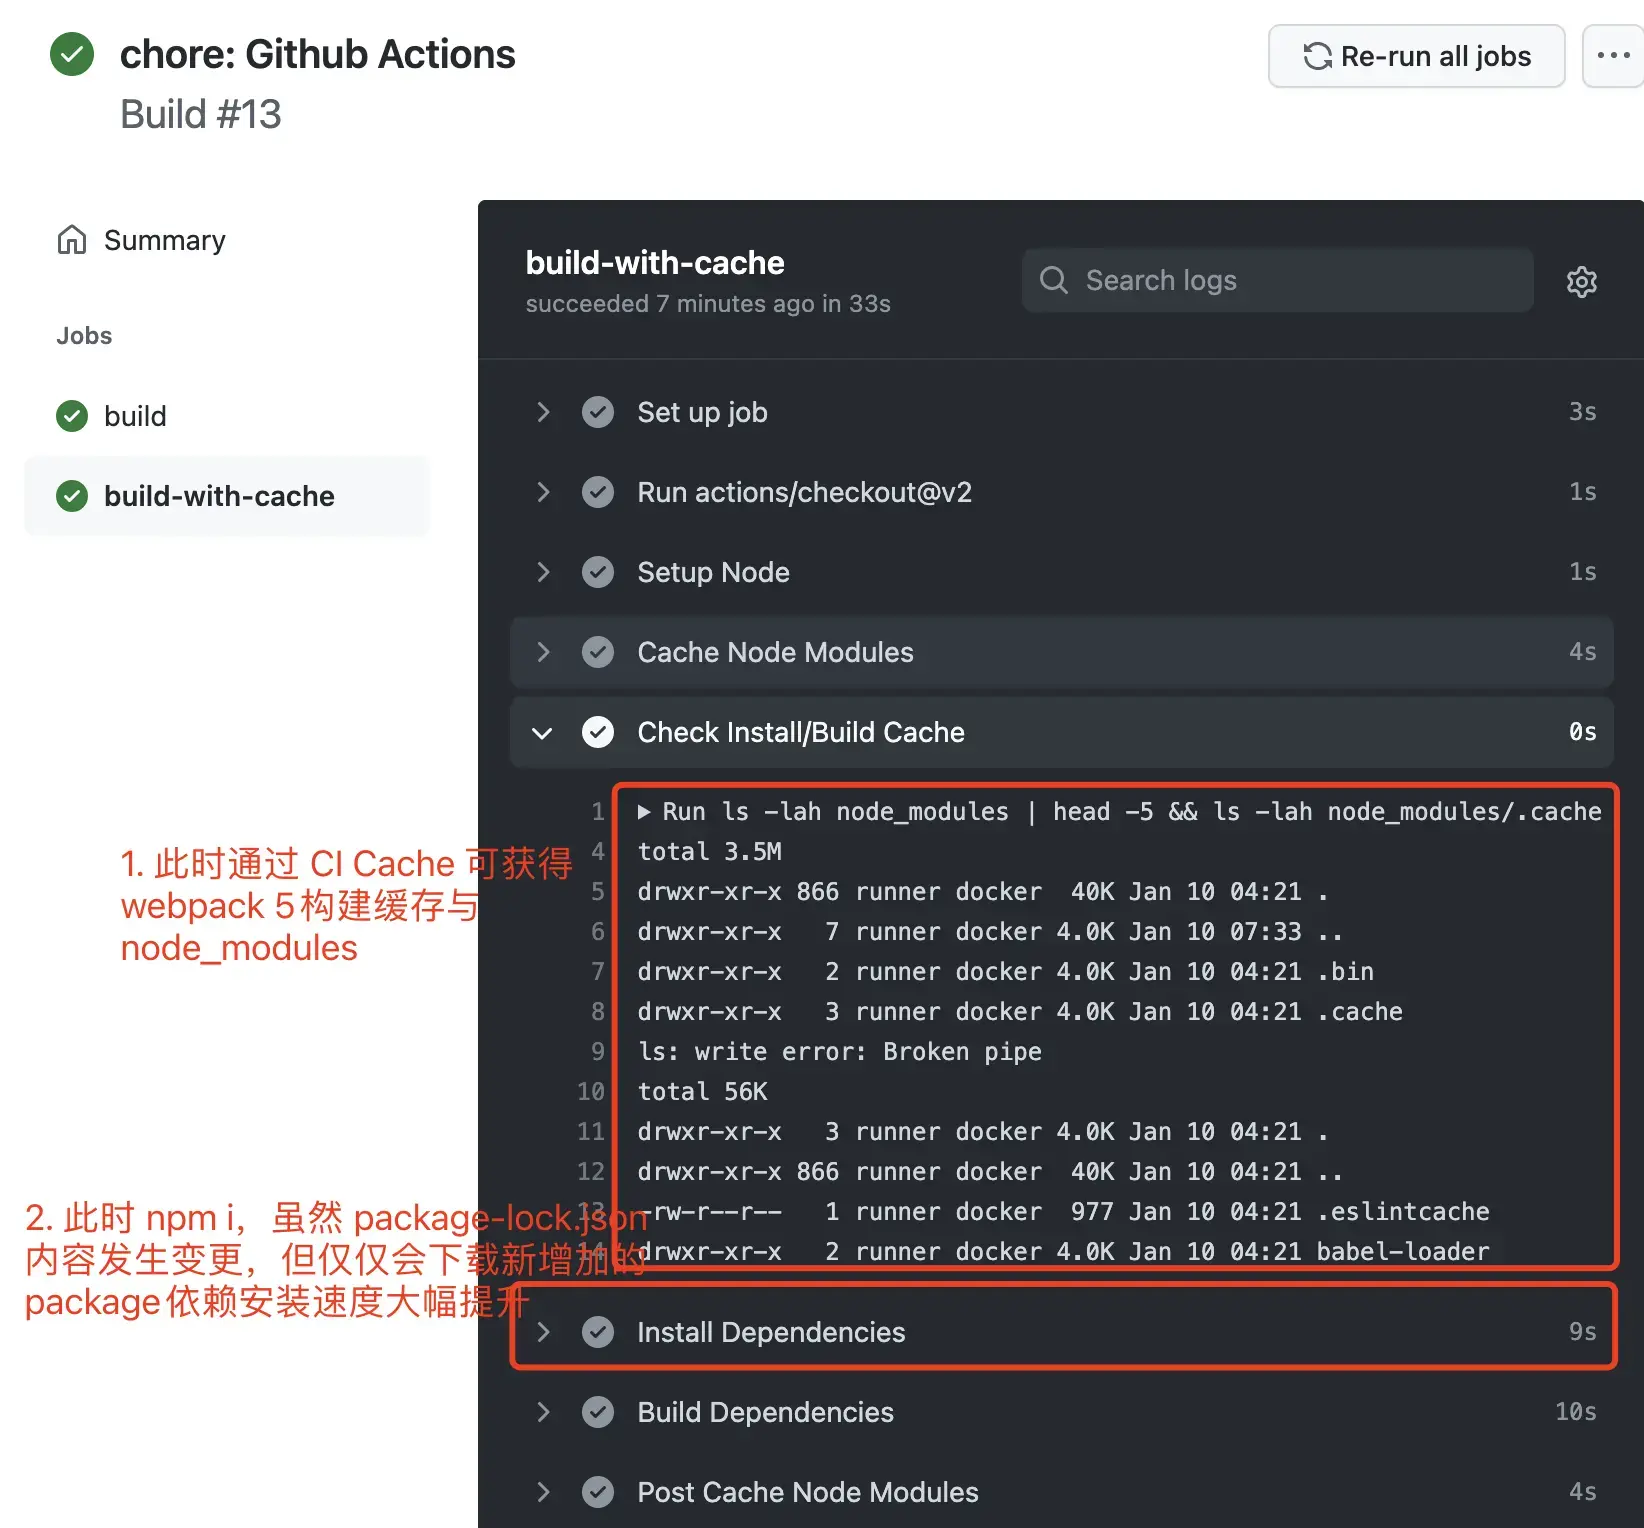
缓存利用成功
为了保证缓存确实已设置成功,可在依赖安装之前通过 ls -lah node_modules 查看 node_modules 目录是否有文件。
# 查看缓存是否设置成功,输出 node_modules 目录
- name: Check Install/Build Cache
  run: ls -lah node_modules | head -5
steps.cache-node-modules.outputs.cache-hit 可获得 ID 为 cache-node-modules 该步骤,是否命中缓存。若命中,则无需再次安装依赖。
- name: Install Dependencies
  # 如果命中 key,则直接跳过依赖安装
  if: steps.cache-node-modules.outputs.cache-hit != 'true'
  run: yarn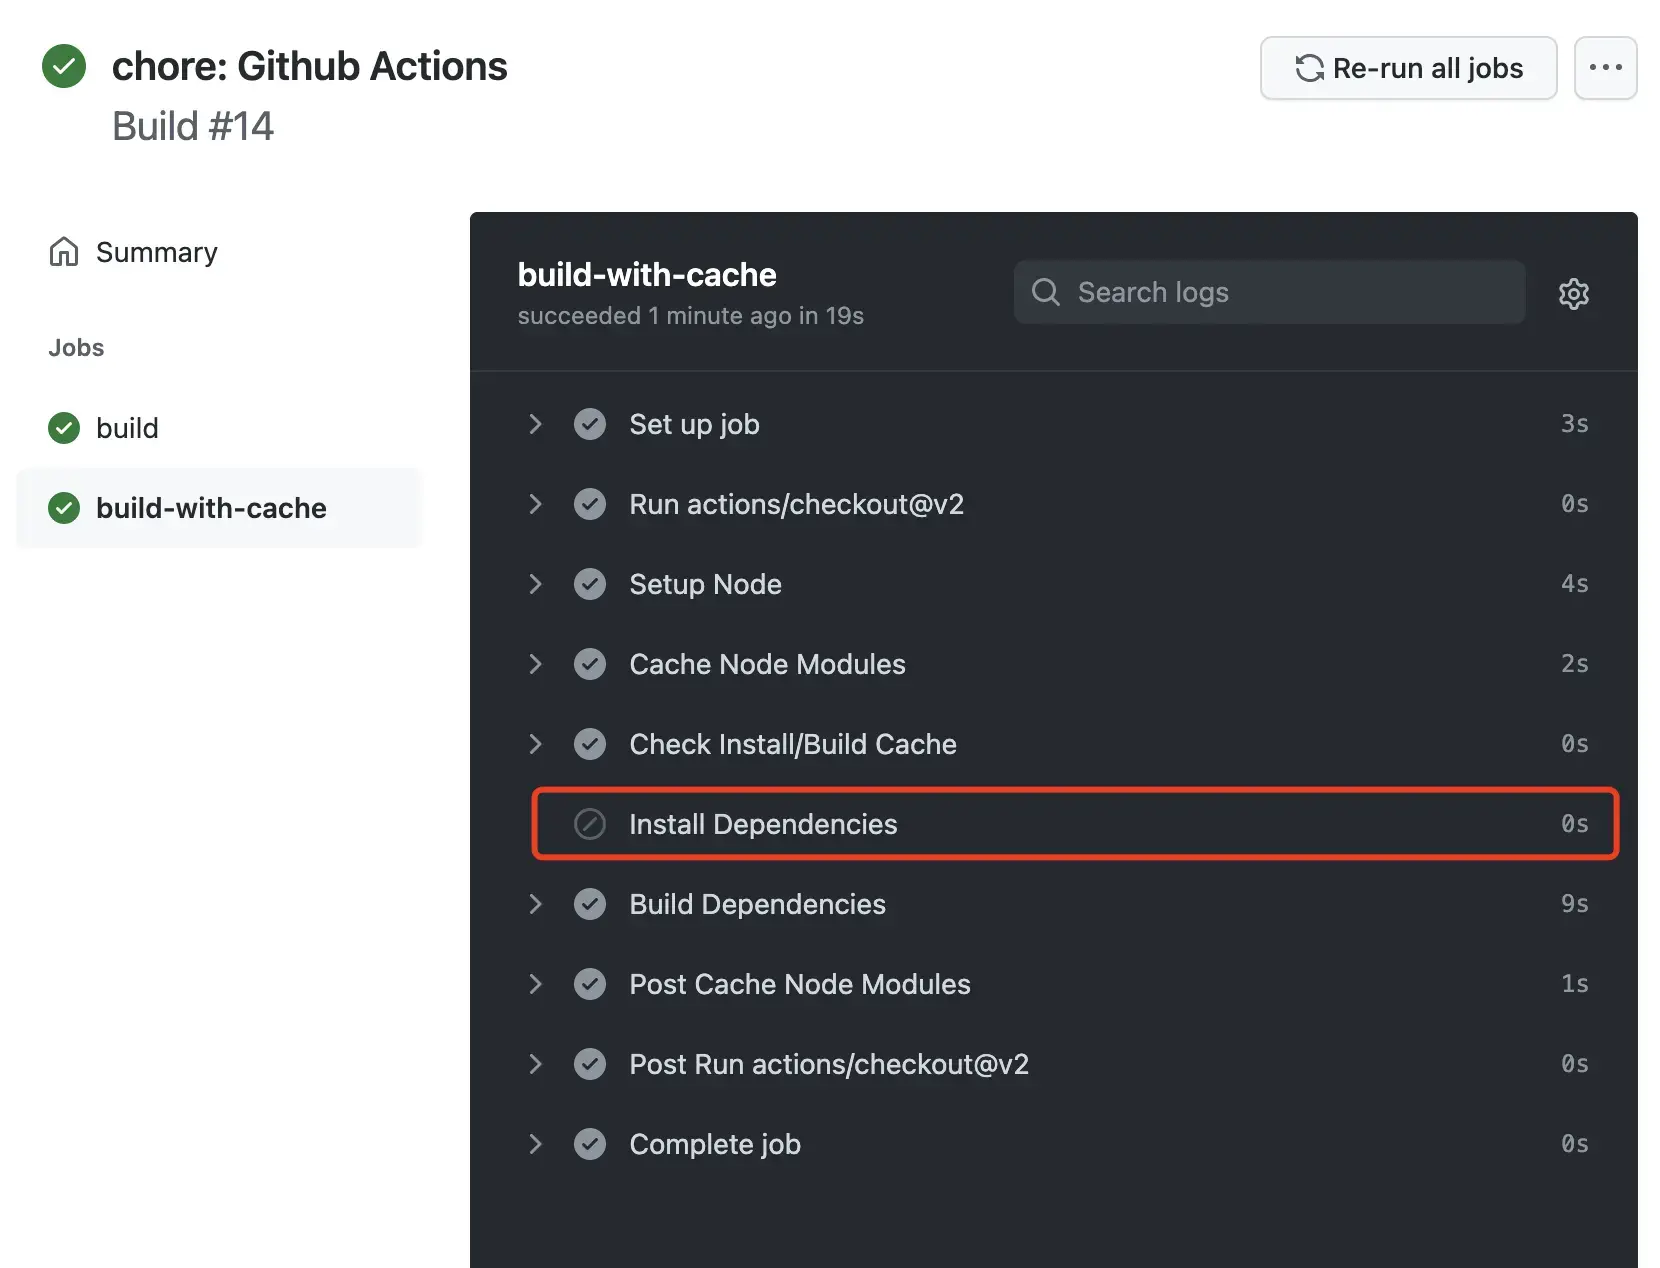
即使缓存未命中,我们也可以同样利用 node_modules 中内容,依赖安装时间也大幅降低。
完整配置文件如下所示:
name: Build
on: [push]
jobs:
  build-with-cache:
    runs-on: ubuntu-latest
    steps:
      - uses: actions/checkout@v2
      - name: Setup Node
        uses: actions/setup-node@v1
        with:
          node-version: 14.x
      - name: Cache Node Modules
        # 为 step 设置 id,可通过 steps.[id].outputs 获取到该步骤的值
        id: cache-node-modules
        # 使用 cache action 进行目录资源缓存
        uses: actions/cache@v2
        with:
          # 对 node_modules 目录进行缓存
          path: node_modules
          # 根据字段 node-modules- 与 yarn.lock 的 hash 值作为 key
          # 当 yarn.lock 内容未发生更改时,key 将不会更改,则命中缓存
          # 如果使用 npm 作为包管理工具,则是 package-lock.json
          key: node-modules-${{ hashFiles('yarn.lock') }}
          restore-keys: node-modules-

      # 查看缓存是否设置成功,输出 node_modules 目录
      - name: Check Install/Build Cache
        run: ls -lah node_modules | head -5

      - name: Install Dependencies
        # 如果命中 key,则直接跳过依赖安装
        if: steps.cache-node-modules.outputs.cache-hit != 'true'
        run: yarn
      - name: Build Dependencies
        run: npm run build
小结
当我们充分利用了 CI Cache 后,即可充分利用 Pipeline 各个阶段的缓存,如 npm cache、 Webpack 5 的 Cache,Docker 镜像构建时的 Cache。从而降低每次部署的上线时间。