有没有读过 koa 的源码,什么是洋葱模型呢
Issue 欢迎在 Gtihub Issue 中回答此问题: Issue 119
Author 回答者: shfshanyue
四十行代码实现一个 koa
当我们在深入学习一个框架或者库时,为了了解它的思想及设计思路,也为了更好地使用和避免无意的 Bug,有时很有必要研究源码。对于 koa 这种极为简单,而应用却很广泛的框架/库更应该了解它的源码。
而为了验证我们是否已足够了解它,可以实现一个仅仅具备核心功能的迷你的库。正所谓,麻雀虽小,五脏俱全。
删繁就简三秋树,这里只用四十行代码实现一个小型的却具有其核心功能的 koa。

这是一个拥有 koa 几乎所有核心功能最简化的示例:
const Koa = require("koa");
const app = new Koa();

app.use(async (ctx, next) => {
  console.log("Middleware 1 Start");
  await next();
  console.log("Middleware 1 End");
});

app.use(async (ctx, next) => {
  console.log("Middleware 2 Start");
  await next();
  console.log("Middleware 2 End");

  ctx.body = "hello, world";
});

app.listen(3000);

// output
// Middleware 1 Start
// Middleware 2 Start
// Middleware 2 End
// Middleware 1 End
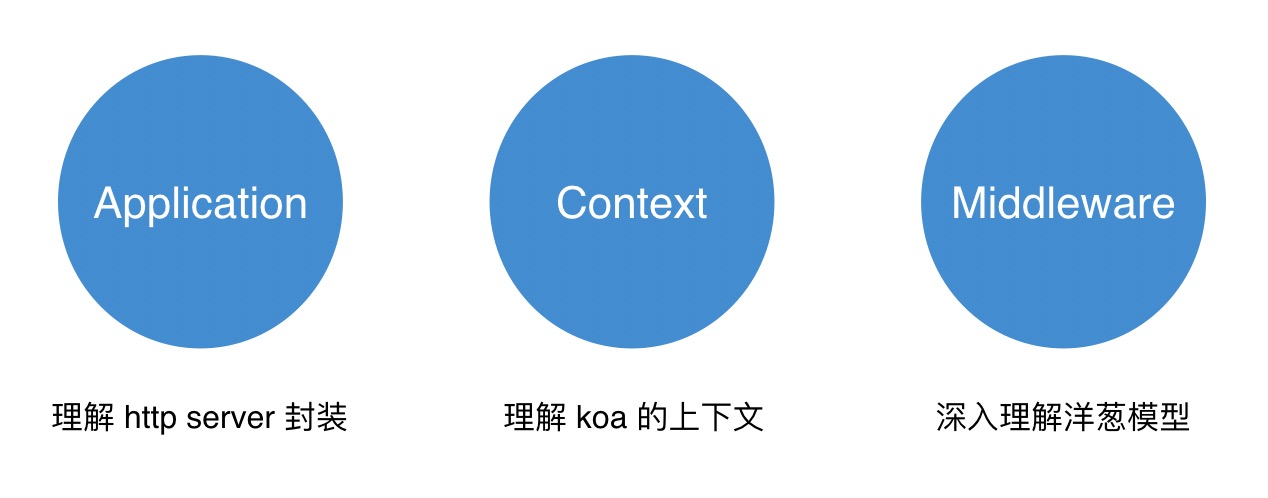
在这个最简化的示例中,可以看到有三个清晰的模块,分别如下:
- Application: 基本服务器框架
- Context: 服务器框架基本数据结构的封装,用以 http 请求解析及响应
- Middleware: 中间件,也是洋葱模型的核心机制

我们开始逐步实现这三个模块:
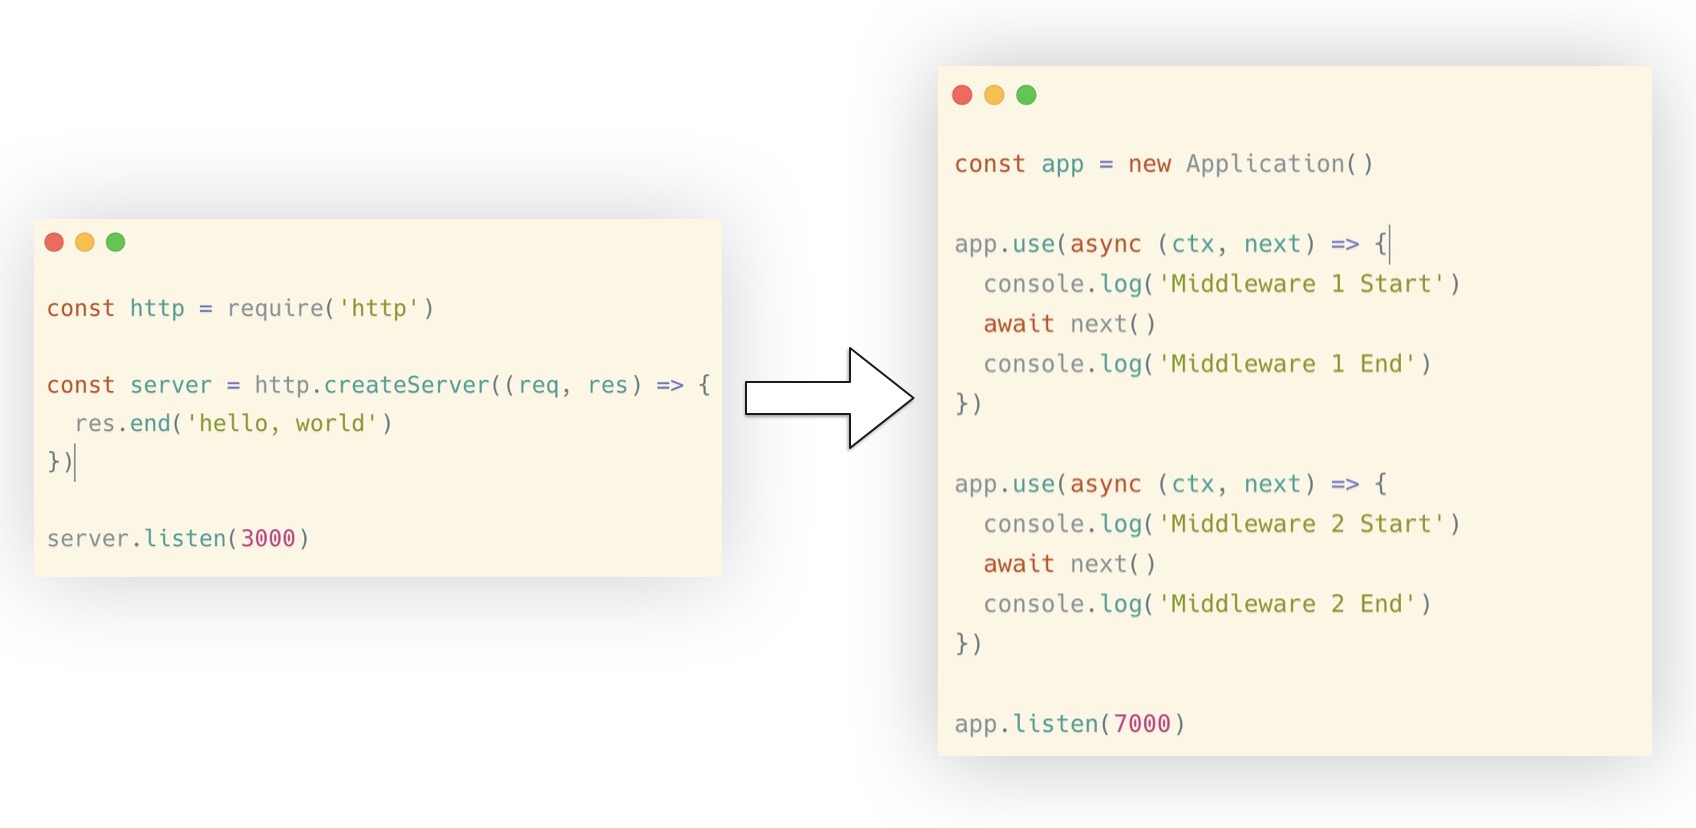
抛开框架,来写一个简单的 server
我们先基于 node 最基本的 http API 来启动一个 http 服务,并通过它来实现最简版的 koa:
const http = require("http");

const server = http.createServer((req, res) => {
  res.end("hello, world");
});

server.listen(3000);
而要实现最简版的 koa 示例如下,我把最简版的这个 koa 命名为 koa-mini
const Koa = require("koa-mini");
const app = new Koa();

app.use(async (ctx, next) => {
  console.log("Middleware 1 Start");
  await next();
  console.log("Middleware 1 End");
});

app.use(async (ctx, next) => {
  console.log("Middleware 2 Start");
  await next();
  console.log("Middleware 2 End");

  ctx.body = "hello, world";
});

app.listen(3000);
构建 Application
首先完成 Appliacation 的大体框架:
app.listen: 处理请求及响应,并且监听端口app.use: 中间件函数,处理请求并完成响应
只有简单的十几行代码,示例如下:
const http = require("http");

class Application {
  constructor() {
    this.middleware = null;
  }

  listen(...args) {
    const server = http.createServer(this.middleware);
    server.listen(...args);
  }

  // 这里依旧调用的是原生 http.createServer 的回调函数
  use(middleware) {
    this.middleware = middleware;
  }
}
此时调用 Application 启动服务的代码如下:
const app = new Appliacation();

app.use((req, res) => {
  res.end("hello, world");
});

app.listen(3000);
由于 app.use 的回调函数依然是原生的 http.crateServer 回调函数,而在 koa 中回调参数是一个 Context 对象。
下一步要做的将是构建 Context 对象。
构建 Context
在 koa 中,app.use 的回调参数为一个 ctx 对象,而非原生的 req/res。因此在这一步要构建一个 Context 对象,并使用 ctx.body 构建响应:
app.use(ctx => ctx.body = 'hello, world'): 通过在http.createServer回调函数中进一步封装Context实现Context(req, res): 以request/response数据结构为主体构造 Context 对象
核心代码如下,注意注释部分:
const http = require("http");

class Application {
  constructor() {}
  use() {}

  listen(...args) {
    const server = http.createServer((req, res) => {
      // 构造 Context 对象
      const ctx = new Context(req, res);

      // 此时处理为与 koa 兼容 Context 的 app.use 函数
      this.middleware(ctx);

      // ctx.body 为响应内容
      ctx.res.end(ctx.body);
    });
    server.listen(...args);
  }
}

// 构造一个 Context 的类
class Context {
  constructor(req, res) {
    this.req = req;
    this.res = res;
  }
}
此时 koa 被改造如下,app.use 可以正常工作:
const app = new Application();

app.use((ctx) => {
  ctx.body = "hello, world";
});

app.listen(7000);
实现以上的代码都很简单,现在就剩下一个最重要也是最核心的功能:洋葱模型
洋葱模型及中间件改造
上述工作只有简单的一个中间件,然而在现实中中间件会有很多个,如错误处理,权限校验,路由,日志,限流等等。因此我们要改造下 app.middlewares
app.middlewares: 收集中间件回调函数数组,并并使用compose串联起来
对所有中间件函数通过 compose 函数来达到抽象效果,它将对 Context 对象作为参数,来接收请求及处理响应:
// this.middlewares 代表所有中间件
// 通过 compose 抽象
const fn = compose(this.middlewares);
await fn(ctx);

// 当然,也可以写成这种形式,只要带上 ctx 参数
await compose(this.middlewares, ctx);
此时完整代码如下:
const http = require("http");

class Application {
  constructor() {
    this.middlewares = [];
  }

  listen(...args) {
    const server = http.createServer(async (req, res) => {
      const ctx = new Context(req, res);

      // 对中间件回调函数串联,形成洋葱模型
      const fn = compose(this.middlewares);
      await fn(ctx);

      ctx.res.end(ctx.body);
    });
    server.listen(...args);
  }

  use(middleware) {
    // 中间件回调函数变为了数组
    this.middlewares.push(middleware);
  }
}
接下来,着重完成 compose 函数
完成 compose 函数的封装

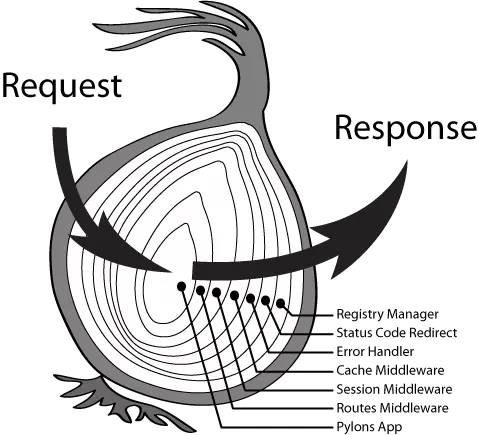
koa 的洋葱模型指出每一个中间件都像是洋葱的每一层,当从洋葱中心穿过时,每层都会一进一出穿过两次,且最先穿入的一层最后穿出。
middleware: 第一个中间件将会执行next: 每个中间件将会通过 next 来执行下一个中间件
我们如何实现所有的中间件的洋葱模型呢?
我们看一看每一个 middleware 的 API 如下
middleware(ctx, next);而每个中间件中的 next 是指执行下一个中间件,我们来把 next 函数提取出来,而 next 函数中又有 next,这应该怎么处理呢?
const next = () => nextMiddleware(ctx, next);
middleware(ctx, next(0));
是了,使用一个递归完成中间件的改造,并把中间件给连接起来,如下所示:
// dispatch(i) 代表执行第 i 个中间件

const dispatch = (i) => {
  return middlewares[i](ctx, () => dispatch(i + 1));
};
dispatch(0);
dispatch(i) 代表执行第 i 个中间件,而 next() 函数将会执行下一个中间件 dispatch(i+1),于是我们使用递归轻松地完成了洋葱模型
此时,再把递归的终止条件补充上: 当最后一个中间件函数执行 next() 时,直接返回
const dispatch = (i) => {
  const middleware = middlewares[i];
  if (i === middlewares.length) {
    return;
  }
  return middleware(ctx, () => dispatch(i + 1));
};
return dispatch(0);
最终的 compose 函数代码如下:
function compose(middlewares) {
  return (ctx) => {
    const dispatch = (i) => {
      const middleware = middlewares[i];
      if (i === middlewares.length) {
        return;
      }
      return middleware(ctx, () => dispatch(i + 1));
    };
    return dispatch(0);
  };
}
至此,koa 的核心功能洋葱模型已经完成,写个示例来体验一下吧:
const app = new Application();

app.use(async (ctx, next) => {
  ctx.body = "hello, one";
  await next();
});

app.use(async (ctx, next) => {
  ctx.body = "hello, two";
  await next();
});

app.listen(7000);
此时还有一个小小的但不影响全局的不足:异常处理,下一步将会完成异常捕获的代码
异常处理
如果在你的后端服务中因为某一处报错,而把整个服务给挂掉了怎么办?
我们只需要对中间件执行函数进行一次异常处理即可:
try {
  const fn = compose(this.middlewares);
  await fn(ctx);
} catch (e) {
  console.error(e);
  ctx.res.statusCode = 500;
  ctx.res.write("Internel Server Error");
}然而在日常项目中使用时,我们必须在框架层的异常捕捉之前就需要捕捉到它,来做一些异常结构化及异常上报的任务,此时会使用一个异常处理的中间件:
// 错误处理中间件
app.use(async (ctx, next) => {
  try {
    await next();
  } catch (err) {
    // 1. 异常结构化
    // 2. 异常分类
    // 3. 异常级别
    // 4. 异常上报
  }
});
小结
koa 的核心代码特别简单,如果你是一个 Node 工程师,非常建议在业务之余研究一下 koa 的源码,并且自己也实现一个最简版的 koa。
我源码实现的仓库为:koa-mini
Author 回答者: Carrie999
我读过,大概是用promise 来实现,一个这个promise 一直在等下一个promise 所以就像洋葱模型了